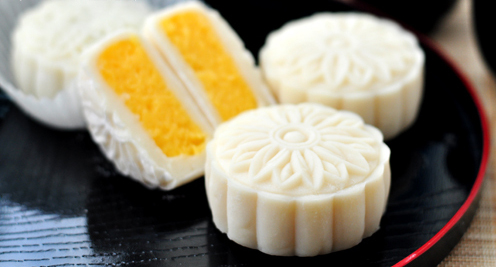
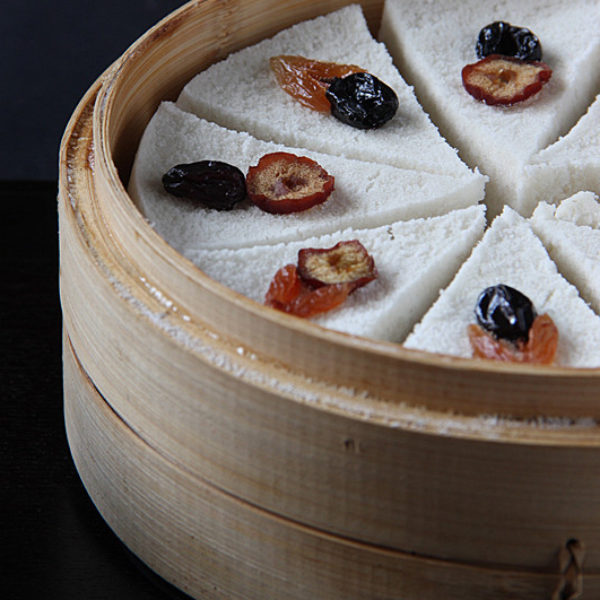
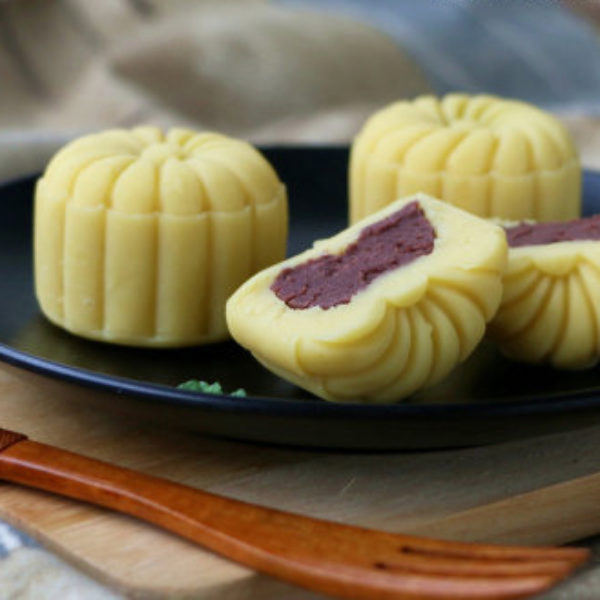
Snow skin mooncake is a traditional Chinese Mid-Autumn Festival food. I remember I was very happy when it was Mid-Autumn Festival, not only because I didn’t need to go to school, but because our family got together to have a big dinner, and I could eat different kinds of mooncakes.
Nowadays I make mooncakes to send home to my family, and I am happy to hear them say how wonderful they taste!
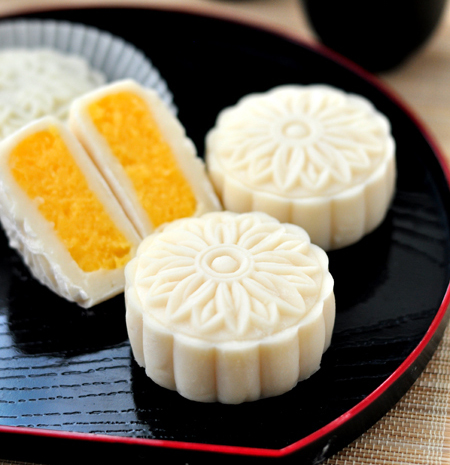
So why do we call it snow skin moon cake?
The main reason is that it is different from the way traditional moon cakes are made. Making them requires no baking.
I have used this recipe for many years, and have been able to tweak the recipe and procedure to ensure the best product possible; and able to help those who may not have experience making dishes like this with common mistakes or problems.
The biggest problem that many people encounter when they made it was that the skin was too sticky.
This problem is generally caused by the following reasons:
The skin must be thoroughly steamed (if you want to double or triple the recipe to get more, it is also best to steam them in small groups, so that they cook more evenly).
The other is to cover with plastic wrap when steaming, strictly prevent the ingress of water vapor to make the skin too humid;
the last one is because the water absorption of the raw materials and the operating environment is different, which makes the skin too sticky. At this time, the amount of milk can be appropriately reduced.
The advantage of this formula is that it has a large moisture content, so the texture is very soft. It will not crack and harden when stored in the refrigerator for a few days (some formulas of snow skin mooncake will be hard after the next day).
Of course, the homemade snow skin mooncake is a food with a short shelf life because it has no preservatives. It should not be stored for more than three days, and it must be refrigerated.
Finally, let’s take a look at the recipe for mooncakes, and hope that it will accompany you to every Mid-Autumn Festival.
(reference component: 63 g makes 8)
snow skin ingredients:
- 1) 45 grams of glutinous rice flour
- 2) 35 grams of rice flour
- 3) 20 grams of wheat starch
- 4) 18 grams of vegetable oil
- 5) 185 grams of milk
- 6) 50 grams of powdered sugar
Milky pineapple filling:
- 1) 250g canned pineapple (dried)
- 2) 50g canned pineapple juice
- 3) 20g fine sugar
- 4) 10g brown sugar
- 5) 10g corn starch
- 6) 1 egg yolk
- 7) 20g milk powder
- 8) 30g butter
Method:
First, we will make the pineapple filling. You can also make snow skin mooncake with other fillings you like, skip 1-6 steps.
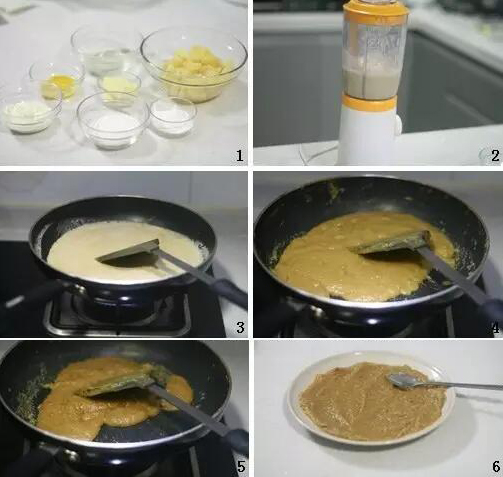
Step 1. Preparing the materials. Canned pineapple: drain water. If fresh pineapple is used, weigh 250 grams of fresh pineapple meat after peeling, and pineapple juice is replaced with 50 grams of water or milk.
Step 2. Put all the materials except butter into the food processor and blend it into a slurry.
Step 3. Pour into the pot. After it begins to bubble, change to medium heat. Add butter and stir fry until the butter is completely melted.
Step 4. The ingredients will begin to thicken.
Step 5. When it becomes a texture similar to the picture in #5, it should be ready.
Step 6. Take out of the pan to cool. If you want to cool down as quickly as possible, pour the stuffing into the flat dish, spread it out with a spoon, and put it in the refrigerator.
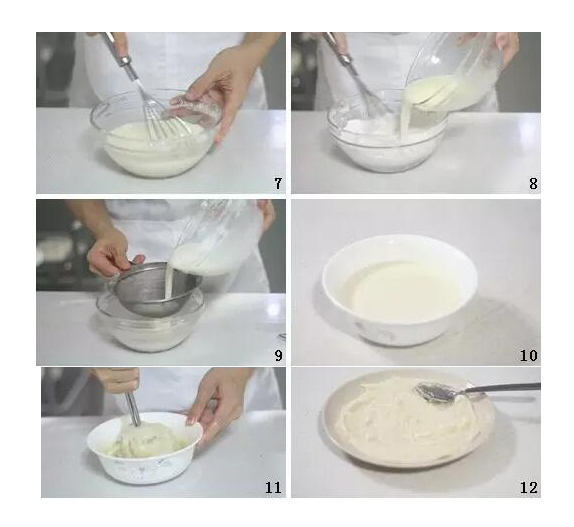
Step 7. Then make the skin. Add milk, vegetable oil (select corn oil, sunflower oil, and other light and tasteless vegetable oil, do not use olive oil, peanut oil, and other oils with strong flavors), and sugar into the bowl, stir evenly.
Step 8. Add glutinous rice flour, rice flour, and wheat starch into another bowl. Pour the milk mixture from the previous step into the powdered mixture and stir while mixing until it is well mixed.
Step 9. Mix and sieve it about 1-2 times.
Step 10. After sieving, let stand for half an hour. Cover the surface with plastic wrap (use a toothpick on the cling film to release hot air), put it in a steamer of boiling water, and steam for 25 minutes.
Step 11. Stir the batter vigorously with chopsticks until it becomes smooth and even.
Step 12. Let the batter cool. Similarly, as the filling, if you want to cool down as quickly as possible, spread it on a plate and put it in the refrigerator.
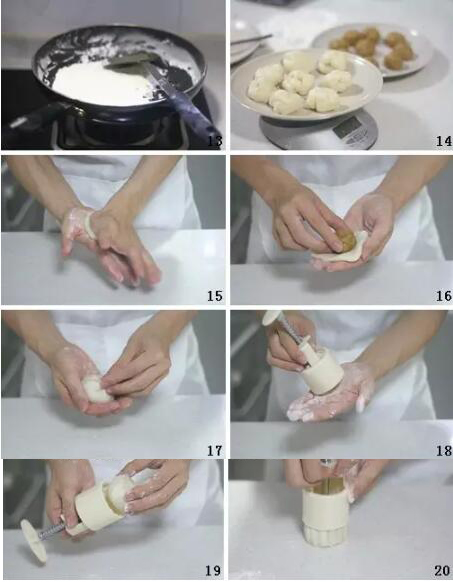
Step 13. Preparing some cake powder: if there is no ready-made cake powder available, put the glutinous rice flour into a pan and heat until slightly yellowish. Taste a small amount, if there is no raw powder taste, it means cooked. Let cool.
Step 14. After cooling, the snow skin batter and the milky pineapple filling are divided into small portions. The skin and stuffing are in a ratio of 6:4. For example, if 63 grams of moon cake is made, the snow skin is divided into 38-gram pieces, and the pineapple filling is divided into 25 grams.
Step 15. Put a little bit of cake powder on your hand to prevent sticking, put the snow skin in the palm of your hand, and press down to flatten.
Step 16. Put pineapple stuffing on the ice skin.
Step 17. Wrap the pineapple stuffing with snow skin and close the opening around the filling tightly.
Step 18. Sprinkle some cake powder in the moon cake mold, shake it- make the cake powder evenly spread on the moon cake mold, and then pour out the excess cake powder into your hand.
Step 19. Put the wrapped dough into the moon cake mold.
Step 20. Press out the shape of the mooncake. At this point, snow skin mooncake is ready. The snow skin mooncake is rested in the refrigerator for a few hours before eating, and then ENJOY!
TIPS:
1. After the skin is steamed, it should be completely cooled, otherwise it will stick. After the skin is cooled, it is still normal when you feel a little sticky. It can be solved by applying a proper amount of cake powder to the hands.
If it is still very sticky after cooling, it may be that it was not covered with plastic wrap when steaming, resulting in excessive moisture. The second is that the skin is not thoroughly cooked and causes stickiness.
2. Rice flour, compared with glutinous rice flour, does not have viscosity and can avoid the skin being too soft. Wheat starch, in addition to making the skin look more transparent, also increases the toughness of the snow skin, so it is not recommended to replace it with other starches. Unless you can’t buy wheat starch, you can use cornstarch instead.
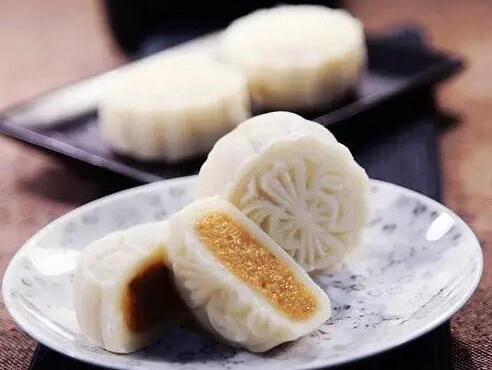
3. Once you master the skin, you can change the filling to different flavors according to your own preferences. Snow skin mooncake’s filling is very flexible: soy bean paste, lotus seed paste, and fruit filling. Your imagination is your only limitation!
4, When forming, there should not be too much cake powder in the hands and moon cake mold, otherwise it will affect the appearance of snow skin mooncake.
More cakes and desserts you should know:
Blueberry Cheesecake Recipe (Step By Step With Image)
Moist And Delicious Sweet Potato Cake Recipe
Chinese Sponge Cake – Simple Version But Delicious
Water Chestnut Cake Recipe – Chinese Famous Dim Sum
Mango Pancakes Recipe – Hong Kong Mango Crepe
Chinese Steamed Sponge Cake Recipe (Ji Dan Gao)
Chinese Rice Cake Recipe – Step By Step Guide
Chinese Pumpkin Cake – Two Methods, You Must Love One Of Them
Mung Bean Cake Recipe – Two Scrumptious Versions
Fa Gao (Fortune Cake) – Chinese Steamed Cakes
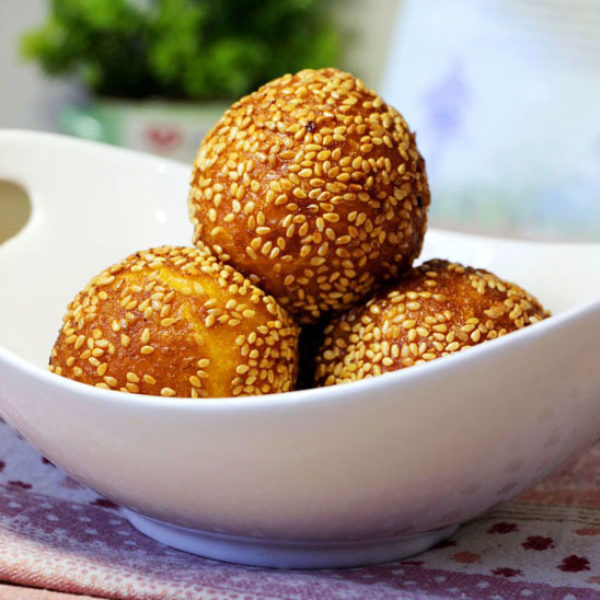
Snow Skin Mooncake With Milky Pineapple Filling
Ingredients
- 45 grams of glutinous rice flour
- 35 grams of rice flour
- 20 grams of wheat starch
- 18 grams of vegetable oil
- 185 grams of milk
- 50 grams of powdered sugar
- 250 g canned pineapple dried
- 50 g canned pineapple juice
- 20 g fine sugar
- 10 g brown sugar
- 10 g corn starch
- 1 egg yolk
- 20 g milk powder
- 30 g butter
Instructions
- Preparing the materials. Canned pineapple: drain water. If fresh pineapple is used, weigh 250 grams of fresh pineapple meat after peeling, and pineapple juice is replaced with 50 grams of water or milk.
- Put all the materials except butter into the food processor and blend it into a slurry.
- Pour into the pot. After it begins to bubble, change to medium heat. Add butter and stir fry until the butter is completely melted.
- The ingredients will begin to thicken.
- When it becomes a texture similar to the picture in #5, it should be ready.
- Take out of the pan to cool. If you want to cool down as quickly as possible, pour the stuffing into the flat dish, spread it out with a spoon, and put it in the refrigerator.
- Then make the skin. Add milk, vegetable oil (select corn oil, sunflower oil and other light and tasteless vegetable oil, do not use olive oil, peanut oil and other oils with strong flavors), and sugar into the bowl, stir evenly.
- Add glutinous rice flour, rice flour, and wheat starch into another bowl. Pour the milk mixture from the previous step into the powdered mixture and stir while mixing until it is well mixed.
- Mix and sieve it about 1-2 times.
- After sieving, let stand for half an hour. Cover the surface with plastic wrap (use a toothpick on the cling film to release hot air), put it in a steamer of boiling water, and steam for 25 minutes.
- Stir the batter vigorously with chopsticks until it becomes smooth and even.
- Let the batter cool. Similarly as the filling, if you want to cool down as quickly as possible, spread it on a plate and put it in the refrigerator.
- Preparing some cake powder: if there is no ready-made cake powder available, put the glutinous rice flour into a pan and heat until slightly yellowish. Taste a small amount, if there is no raw powder taste, it means cooked. Let cool.
- After cooling, the snow skin batter and the milky pineapple filling are divided into small portions. The skin and stuffing are in a ratio of 6:4. For example, if 63 grams of moon cake is made, the snow skin is divided into 38 gram pieces, and the pineapple filling is divided into 25 grams.
- Put a little bit of cake powder on your hand to prevent sticking, put the snow skin in the palm of your hand and press down to flatten.
- Put pineapple stuffing on the ice skin.
- Wrap the pineapple stuffing with snow skin and close the opening around the filling tightly.
- Sprinkle some cake powder in the moon cake mold, shake it- make the cake powder evenly spread on the moon cake mold, and then pour out the excess cake powder into your hand.
- Put the wrapped dough into the moon cake mold.
- Press out the shape of the mooncake. At this point, snow skin mooncake is ready. The snow skin mooncake is rested in the refrigerator for a few hours before eating, and then ENJOY!

Thank you so much